How To Add Fabric Cut Actuals
Cut Module
- Cutting and Bundling (Panels)
- Piping
Cutting and Bundling (Panels)
Once the marker is entered user needs to make the cutting and generate bundles for that sale order. Generally cutting is advised to be done with main usage fabric only.
Path to follow:
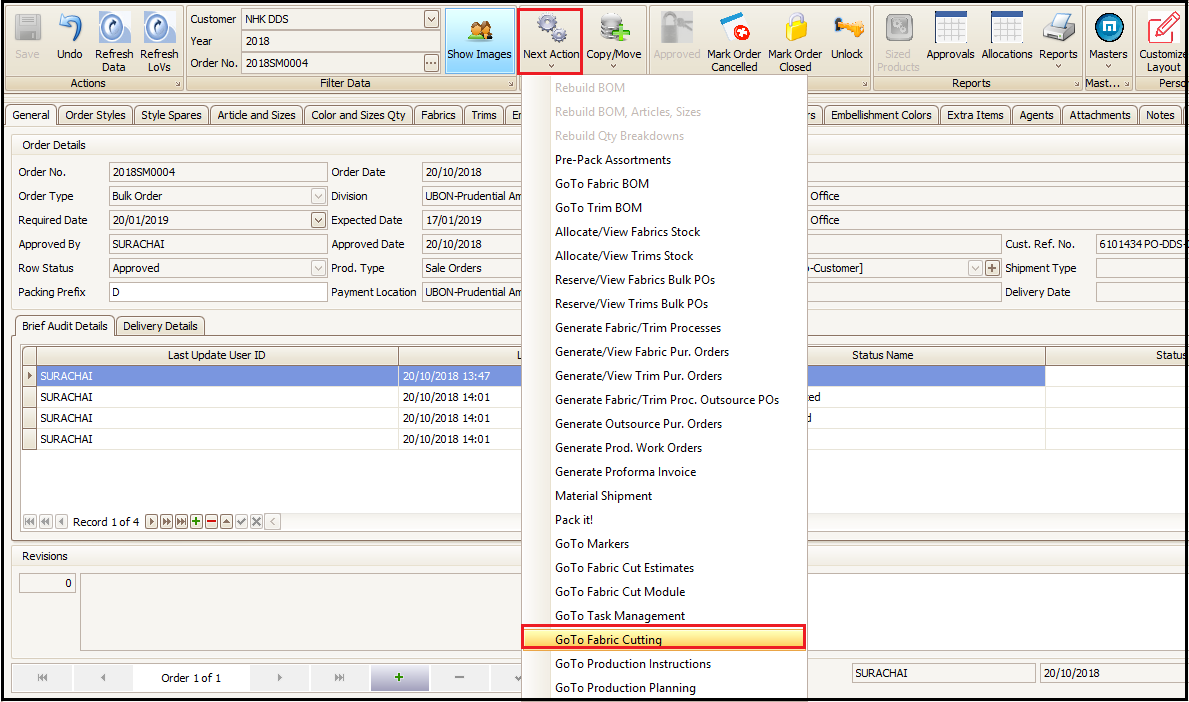
- Open Sale Order
- Next Action
- Click on Go to Fabric Cutting
- Click ‘Yes’ on Confirmation pop up
- User needs to click on + as highlighted below to enter the information of style, usage and sale order.

- User needs to select Style Spare Code, Usage Code and Add Orders (Sale Order) for which cutting needs to be done. Once user clicks on Add Order a new pop window will open which will have the list of sale orders created in system for that particular style. User will select the correct sale order, for which cutting needs to be done, and then include and exit as per the highlighted sequence.
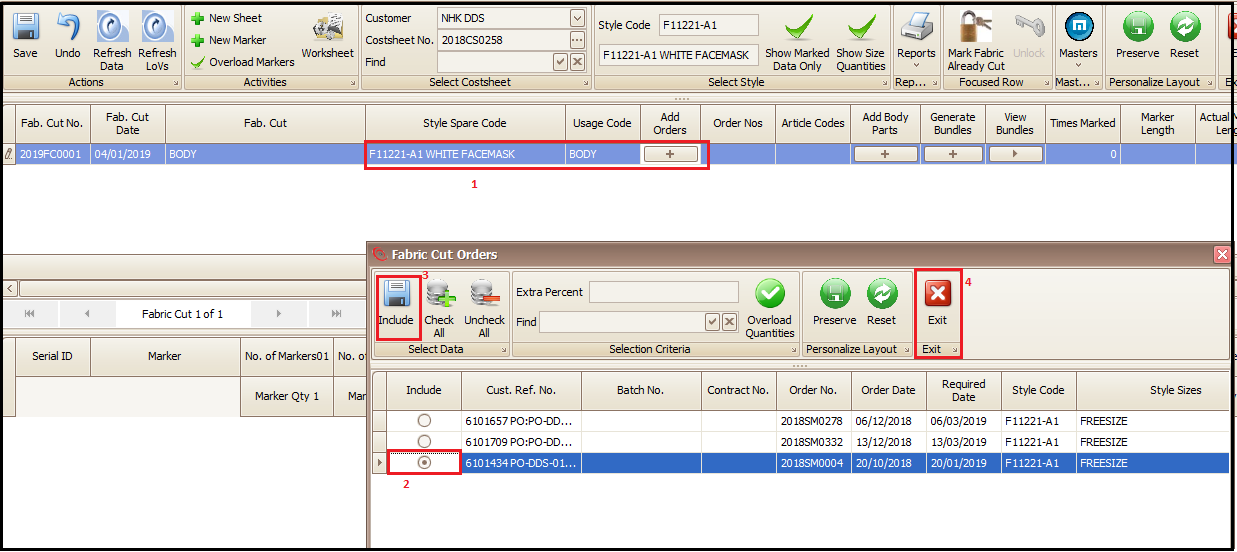
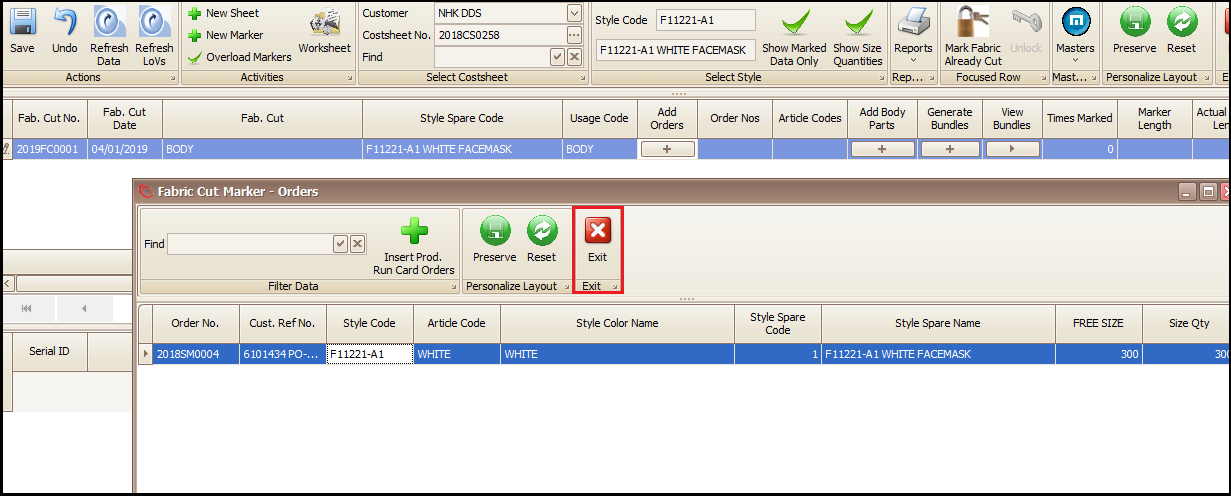
- Then click on exit in the newly appeared window. This window is for confirming color size qty.
- Click on + at the bottom to add new marker (user can type the marker name). If marker is already added then user can select the marker from drop down for the respective above selected usage type.

- If new marker is being created then user will type the marker qty ratio for each size (though here we have only one size in this sale order).
- This will also be the cutting table information which gives you the number of plies, layer length to be laid on cutting table along with marker efficiency. The number of plies also define the size of bundle (here 20 cut panels will be
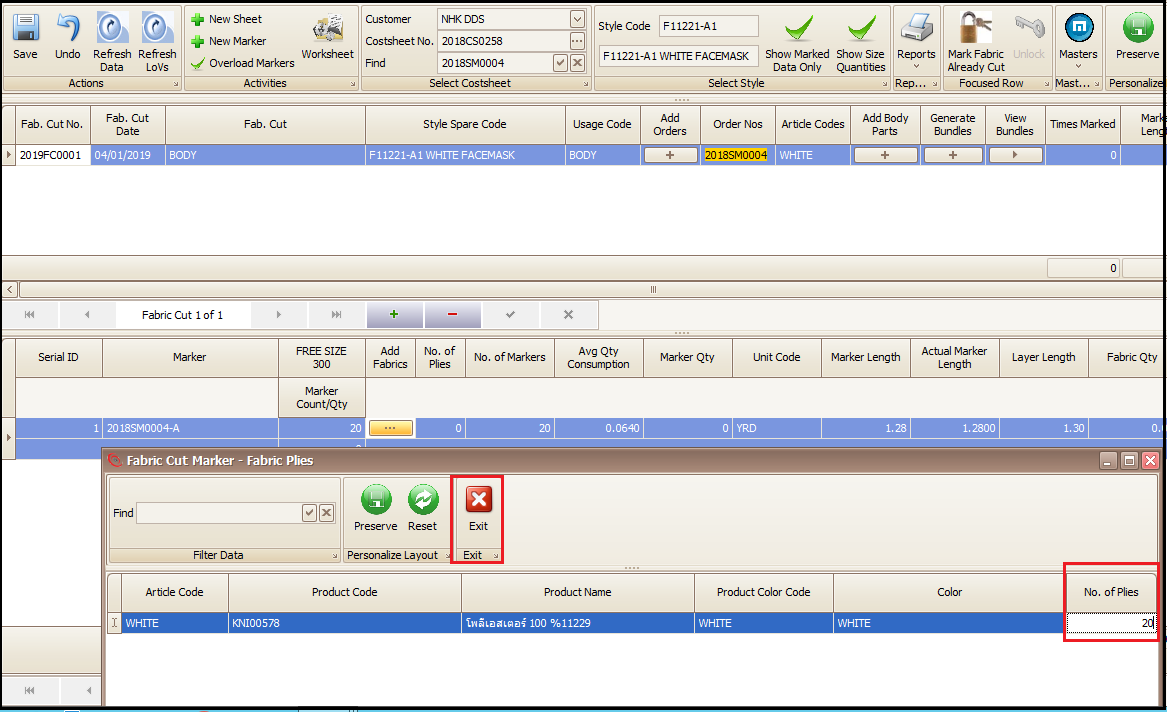
- After selecting/adding the marker user will add the fabric by clicking on Add Fabric link. A new window will open when user click on + to add the fabric details(color) by selecting from drop downs as shown in screen below.
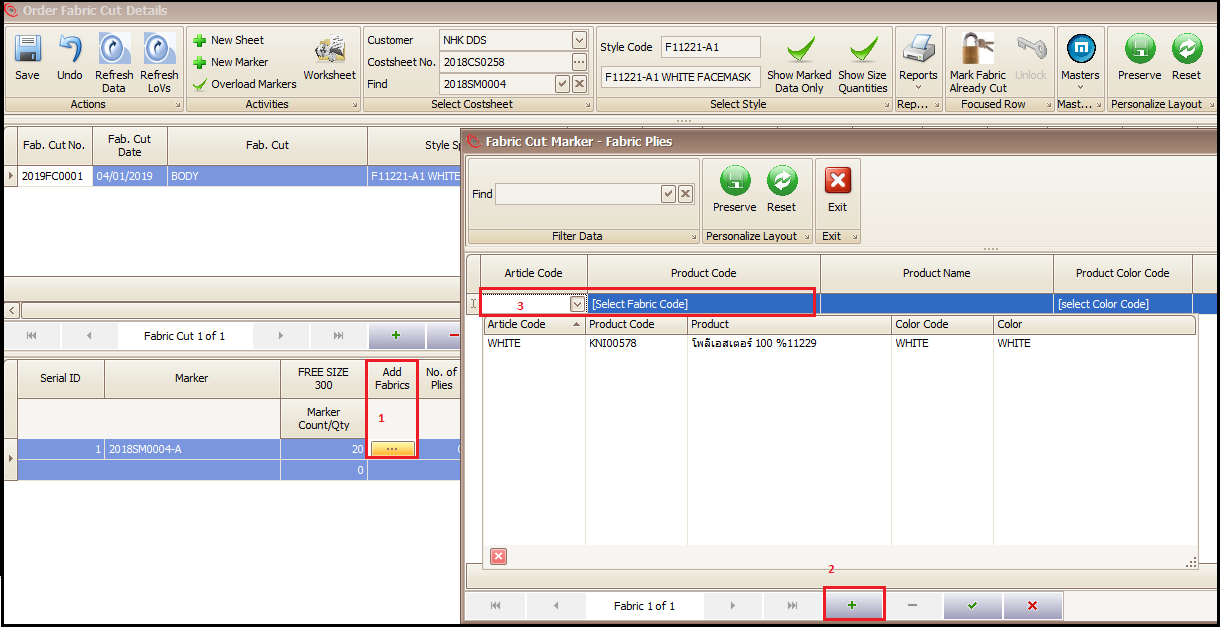
- After fabric details are added user will add the color of the fabric and no. of plies to be laid on table for cutting and then click on green tick to save it and exit the pop window screen.
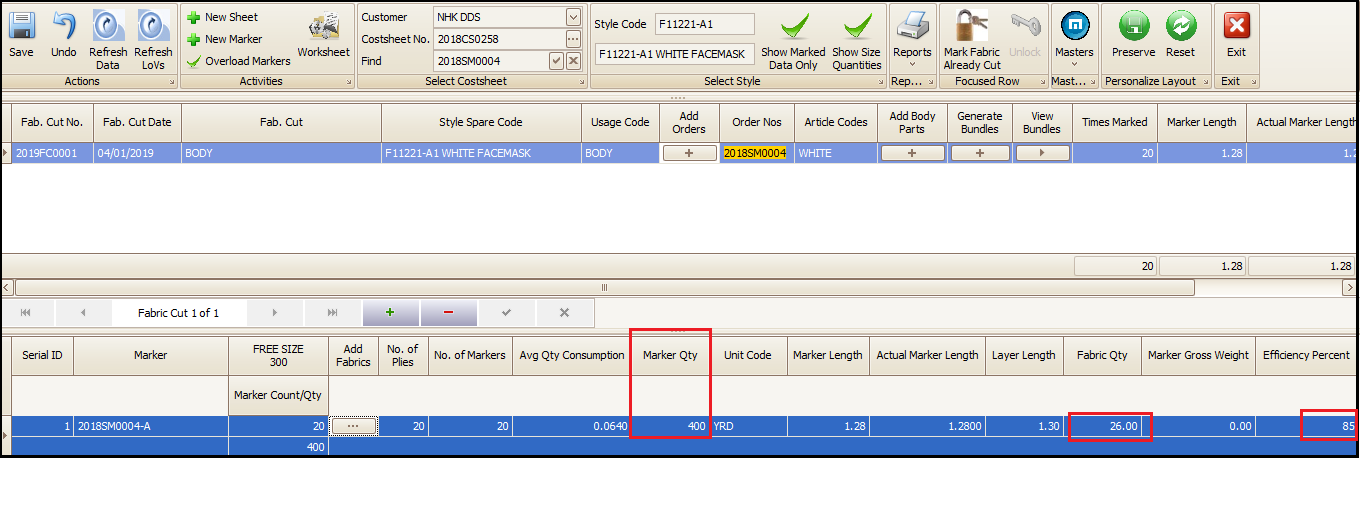
- As the user exits from previous pop up screen after entering the number of plies, in main screen system calculates the marker quantity (to be cut) along with fabric quantity required for cutting and marker efficiency.
- Marker quantity = Marker Count/Qty X No. of plies (Both entered by user as per marker details)
- Layer Length = Marker Length+ Leverage of folding on cutting table (Both entered by user as per marker details)
- Efficiency Percent= Will be calculated by system as per the entered marker information
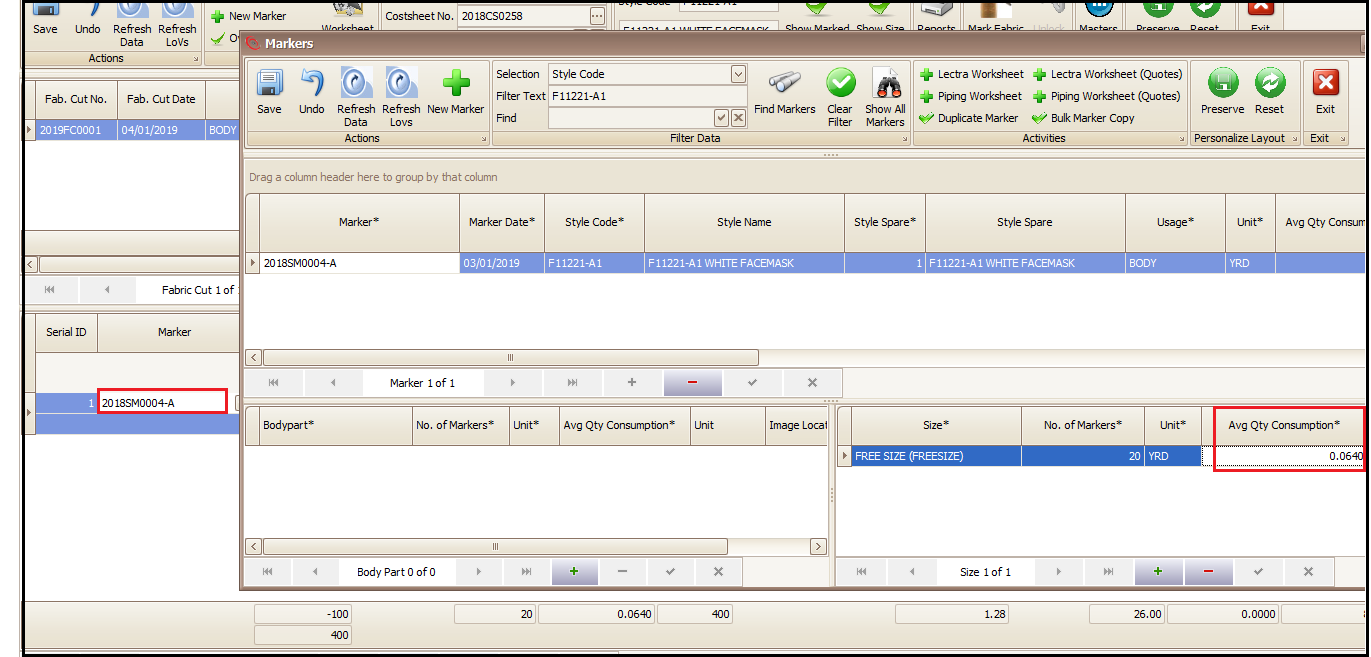
- If the user wishes to make changes in number of plies or consumption then should double click on marker as per below screen and change the average consumption in newly opened window and save it and exit. Rest of things will be recalculated, as earlier, by system itself.
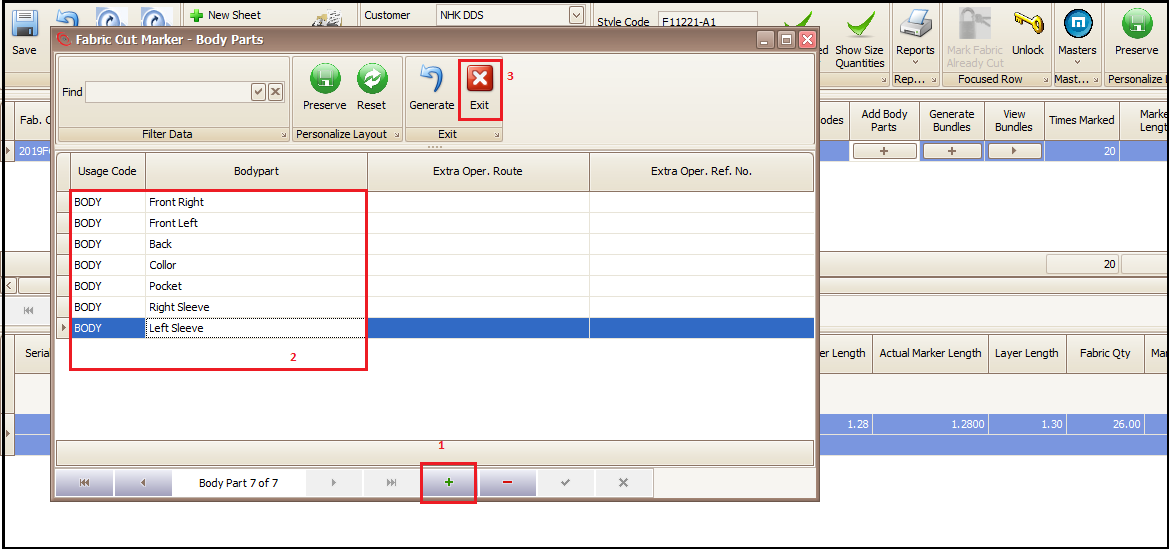
- User will add body parts of cut panels (e.g. front panel, back panel, sleeves, cuffs) by clicking on ‘Add Body Parts’. A new window will open where user has to enter the name of body parts of that garment.
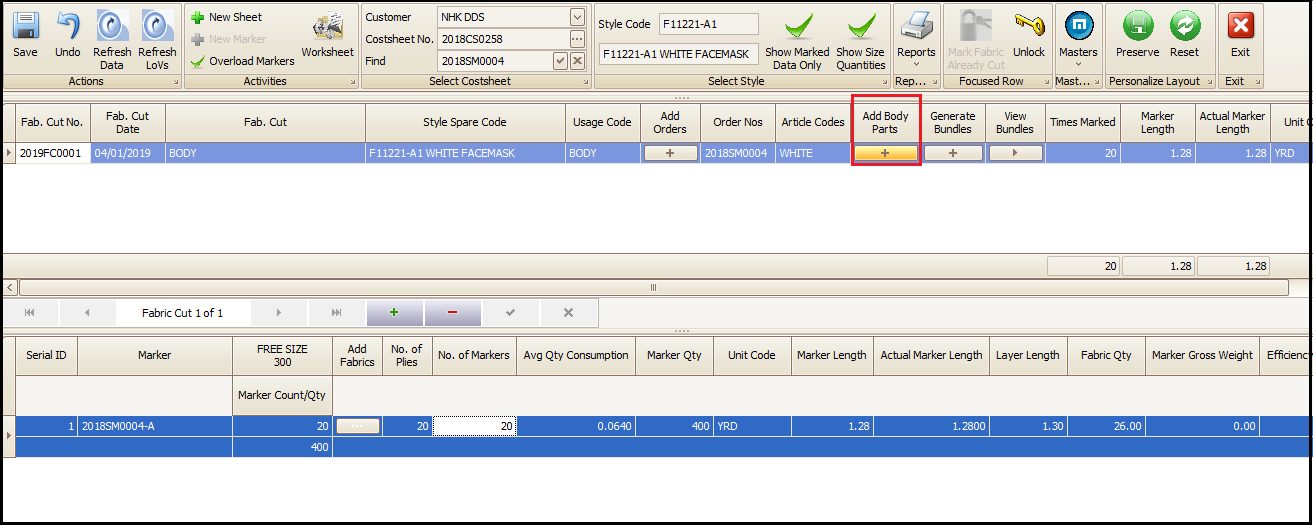
- User will click on + to add the various body parts as per the below screen and add body parts one by one. After adding body parts user will click on exit to exit the screen.
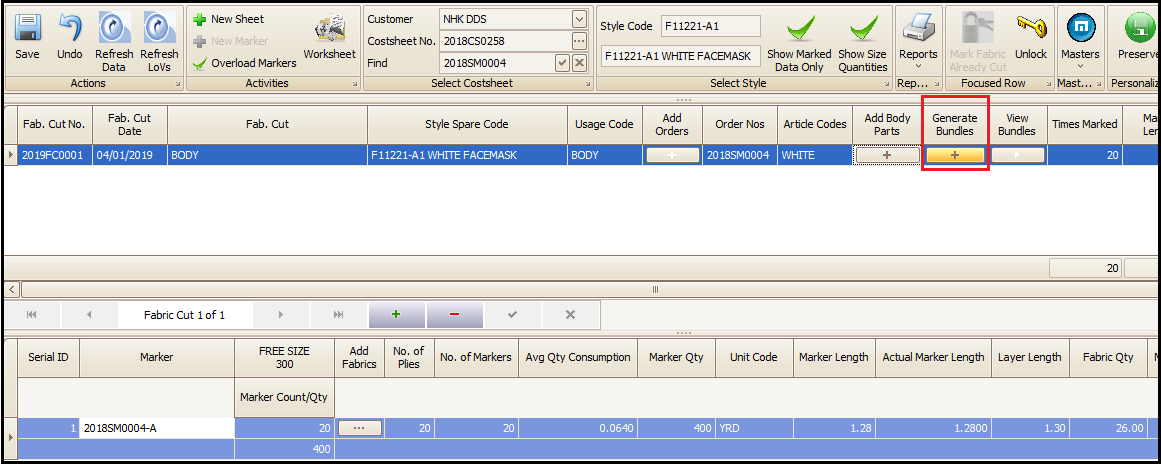
- Then click on generate bundle button to create bundles for each color size as per the marker. These bundles are attached to in-house or outsource work/service orders for dispatch.
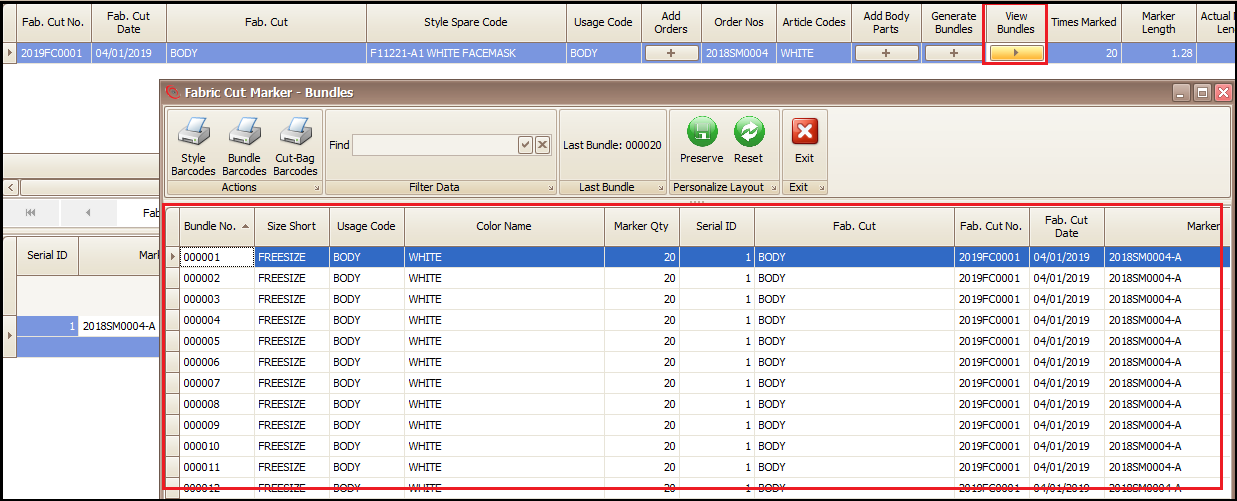
- Next user will click on to View Bundles button and a new window will open to show the list of generated bundles along with other information highlighted in below screen.
- To print the bar-code to attach with bundles of various body parts or cut panels, user will click on Bundle Bar-codes. Then select the Symbology for bar-code types and click on print.

- The print preview of bar-code will have sale order, style, color, size, bundle number, the cut layer marker name, bundle quantity etc. By this information the panel can be identified very easily by anyone that where it belongs to.
- On click at Print, system will show the bar-code preview which further can be printed and attached to cut panels or various body parts as per description in the bar-code sticker. Thus, helping in further production and WIP tracking.

Piping
Piping marker is added differently than other markers. To add piping marker users, have to follow the below path
- Open Sale Order
- Next Action
- Go to Fabric Cutting
- Click ‘Yes’ on Confirmation pop up
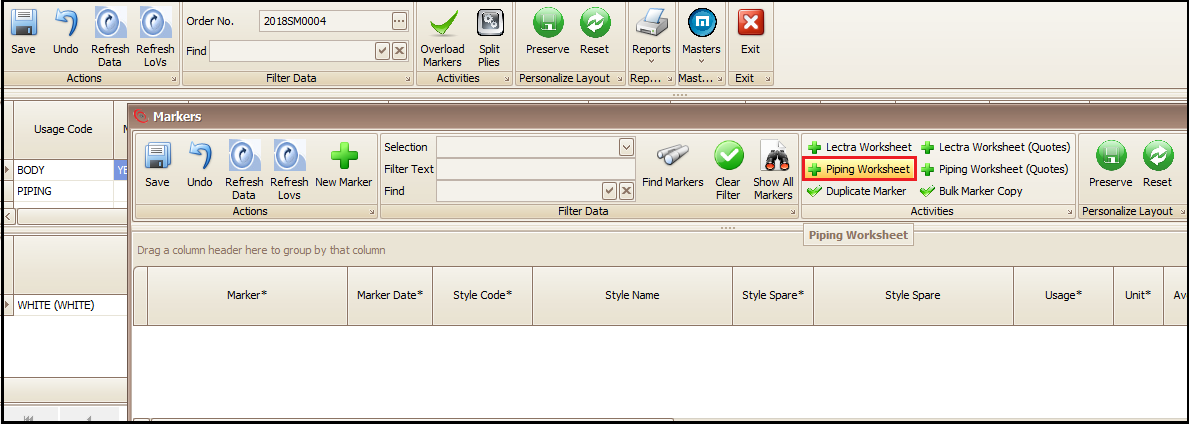
- Masters
- Markers
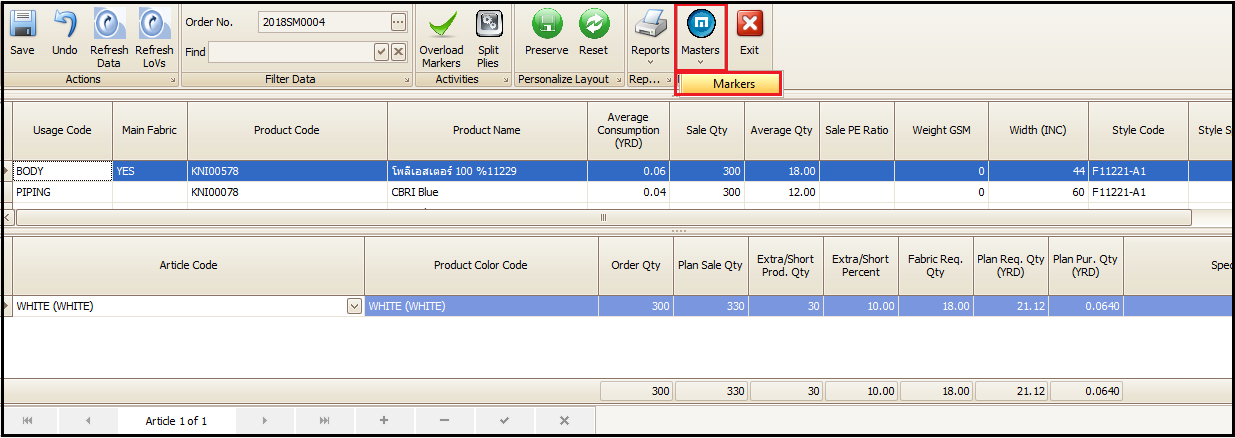
- User will click on ‘Piping Worksheet’ as highlighted. A new window will open.
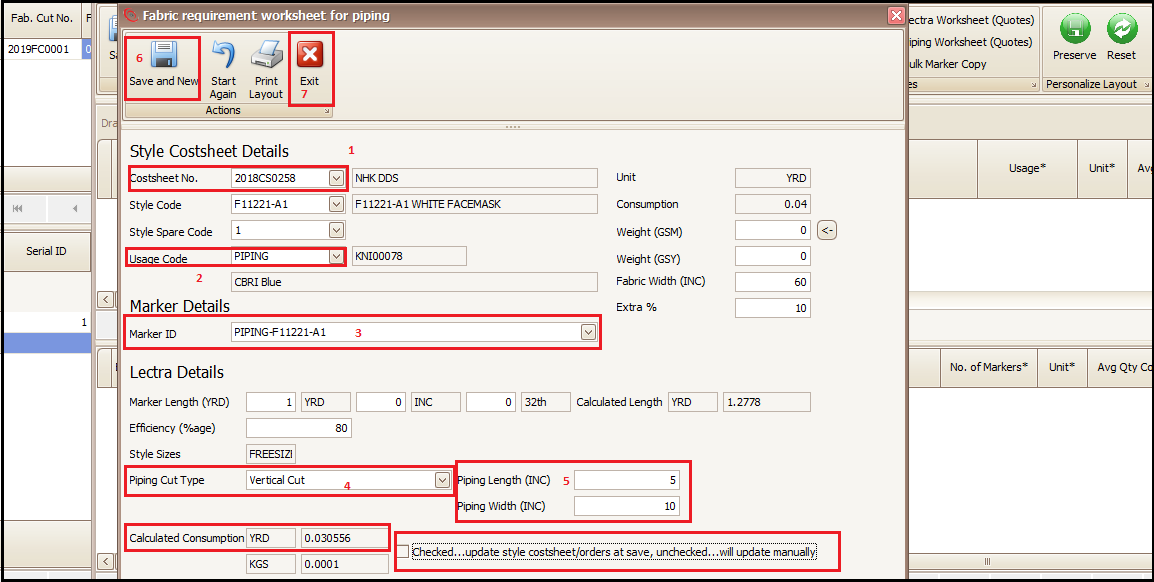
- In newly opened window user will select the cost sheet, usage code (piping), type the piping marker ID and then select the piping cut type as per the marker. There will be 6 types of piping cutting in drop down and user has to choose the right one which they have in the marker.
- After adding all the above information user will enter the piping cut dimensions (length and width in inches). After this, system will auto calculate the consumption of piping based on dimension.
- Keep the Check box un-ticked as highlighted. Now user can save and exit.
- After that user can piping usage as per other body types explained above and highlighted below.
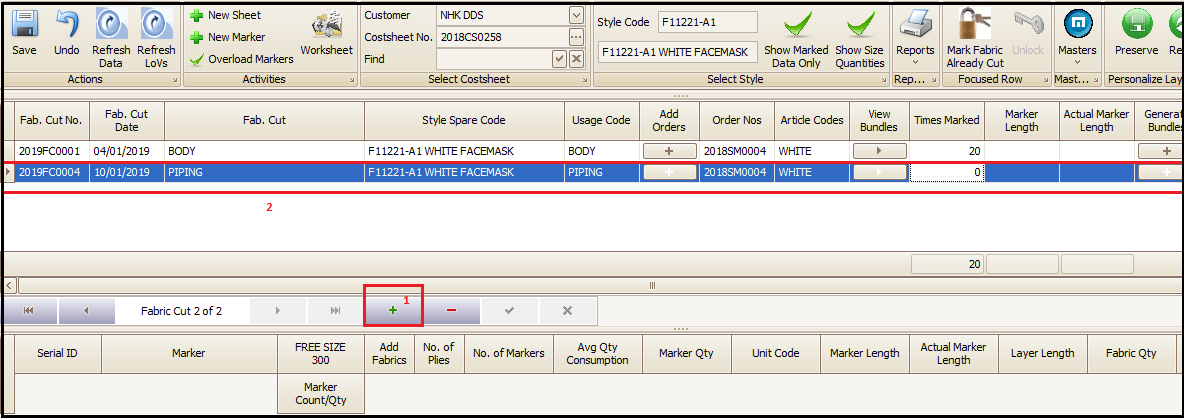
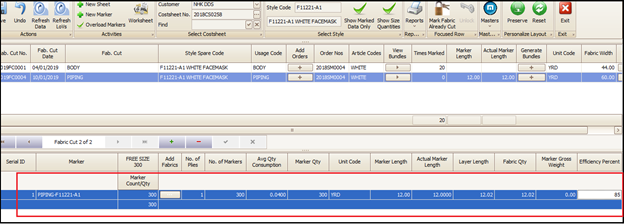
- Now as per the other body type processes explained above user have to select the piping usage marker, add fabric and keep the ‘number of plies as 1 always’. Press exit.
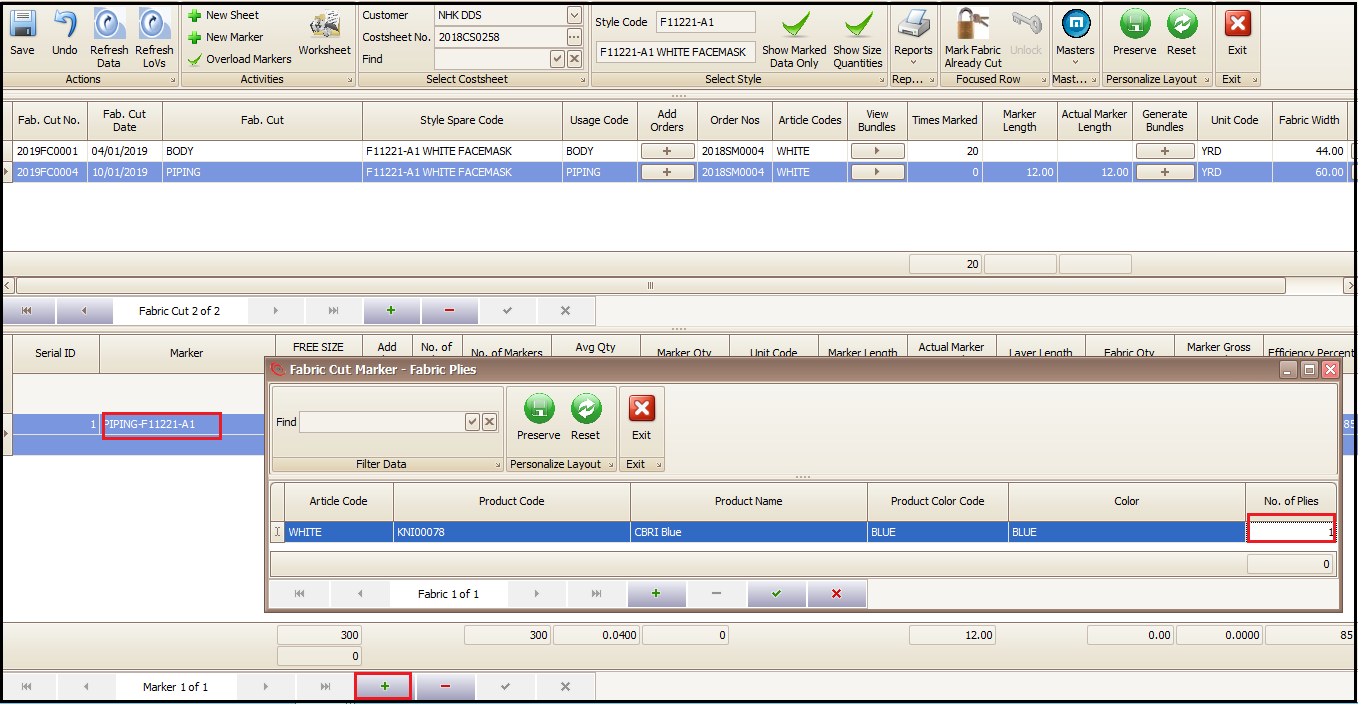
- Rest of the things will be calculated by system. Bar-codes are not printed for Piping.
Created with the Personal Edition of HelpNDoc: Produce online help for Qt applications