How To Create a Order Packing
Packing list
Packing list is created before shipment. Packing list details, the number of pieces per carton along with number of cartons and other required information.
There are 3 types of packing in ApparelConnect:
- Interim Packing (this is used before final packing and if there is not garment stock in warehouse)
- Final Packing (Garment Stock must be there in warehouse to create final packing. Garment stock can be created automatically based on ApparelConnect configuration when we click on Pack It!)
- Blister Based (This type of packing is used when a number of garments/garment set are packed in a blister and then a number of blisters are put in a carton)
The packing type has to be configured in company set up as per the packing type in any factory. The company configuration can be done as per below screen. So, packing type should be chosen carefully.
After choosing and saving Packing Type user can go and start making packing list.

New Packing List
To create a new packing list in ApparelConnect user needs to follow the below steps.
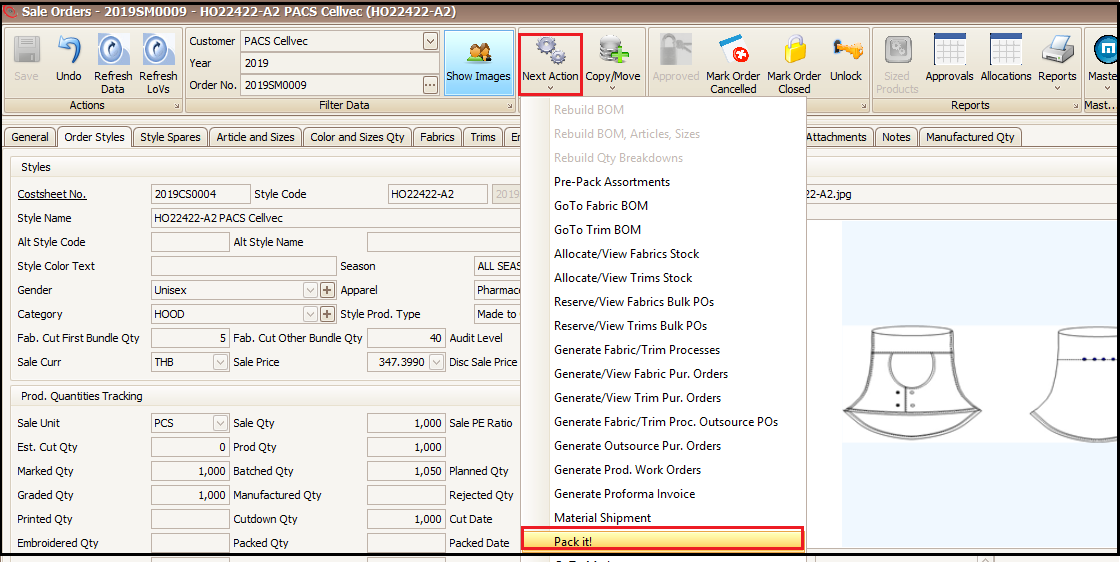
- Open the sale order and click on ‘Next Action’
- Click on ‘Pack it!’ (A new screen will open)
- After clicking on Pack, it! in case of Final Packing, system will ask for creating garment stock automatically for that sale order/contract and then we need to select the finished goods (garment) warehouse.

- Select the warehouse and click on OK.

In case of Interim packing type a new below screen will open when we click on Pack It!
In the newly opened screen, the user will add cartons and per carton quantity (Color/Size wise) from the sale order quantity. To add the cartons user needs to follow below steps:
- Click on ‘Activities’
- Click on ‘New Order/Carton’ (to add quantities from pre-pack entered in sale order click on ‘Build cartons from pre-pack’)
- Click on + to add the color size quantities being packed in that specific carton

1. Interim Packing
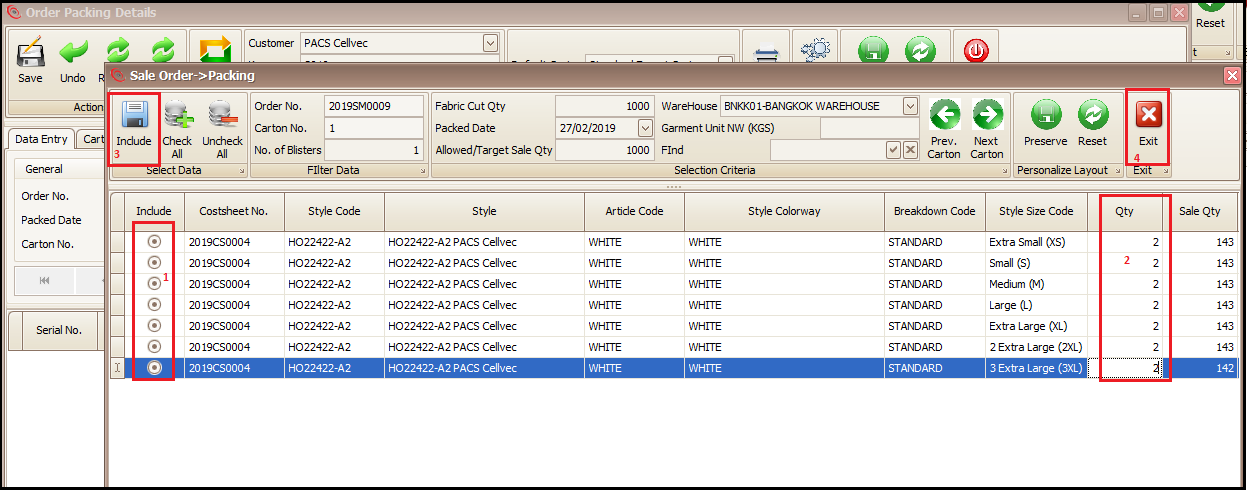
As user clicks on +, a new window will open which will have the sale order quantity with color and size wise details
Steps to follow:
- Select/Include the color and sizes which will packed in this particular carton by clicking on radio buttons
- Enter the color and size ‘Qty’ to be packed in the carton
- Click on ‘Include’ to add the quantities in carton
- Click on exit when carton quantities are entered
2. Final Packing
While in case of Final Packing we need to select the stock IDs (as user clicks on +) of available stock which we are going to pack. This can be done as per below screen.
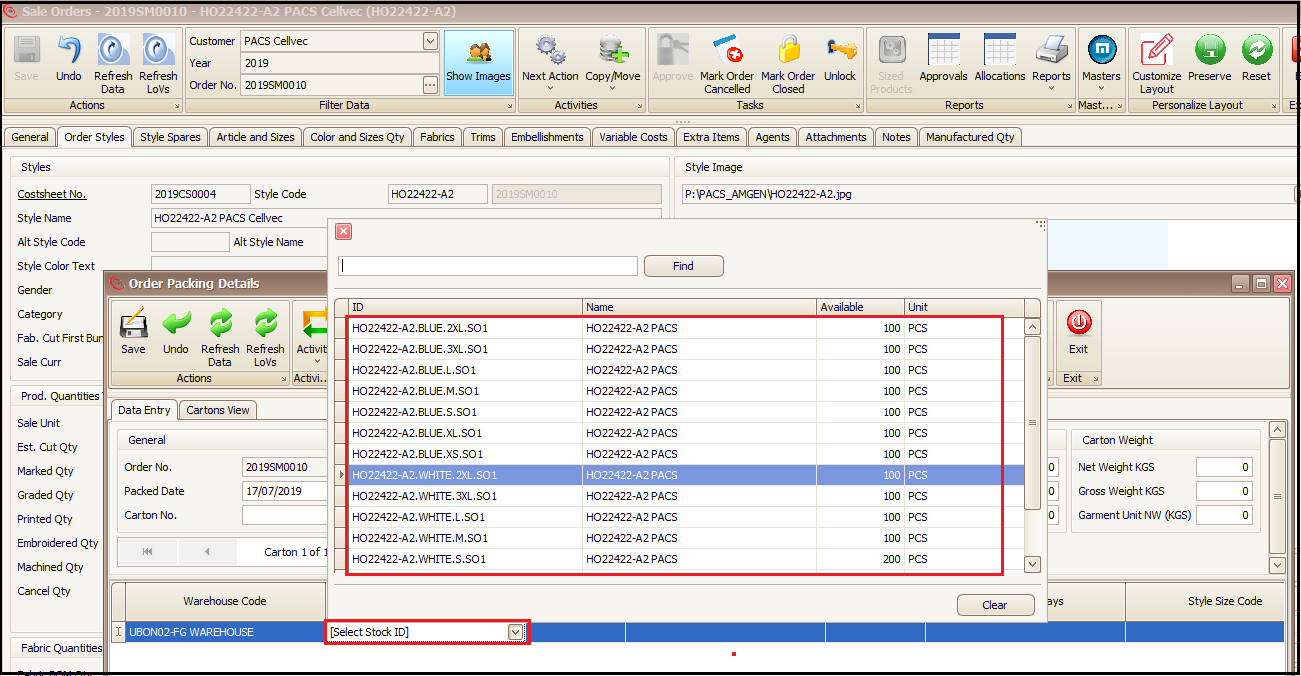
The next screens for final packing are same as Interim packing.
On exiting the system comes to main packing screen where user have to enter the carton details (weight and dimensions) highlighted along with carton prefix.

To add all next desired (or all) number of cartons in this specific packing list user need not to go to ‘Add New Order/Carton’ to add next carton but can follow the below steps:
- Replicate Quantities (this will copy the quantities of already created carton to this next carton: Replicate Quantities does not work for Final packing and user has to manually add new carton as we did for first carton)
- Click on ‘OK’
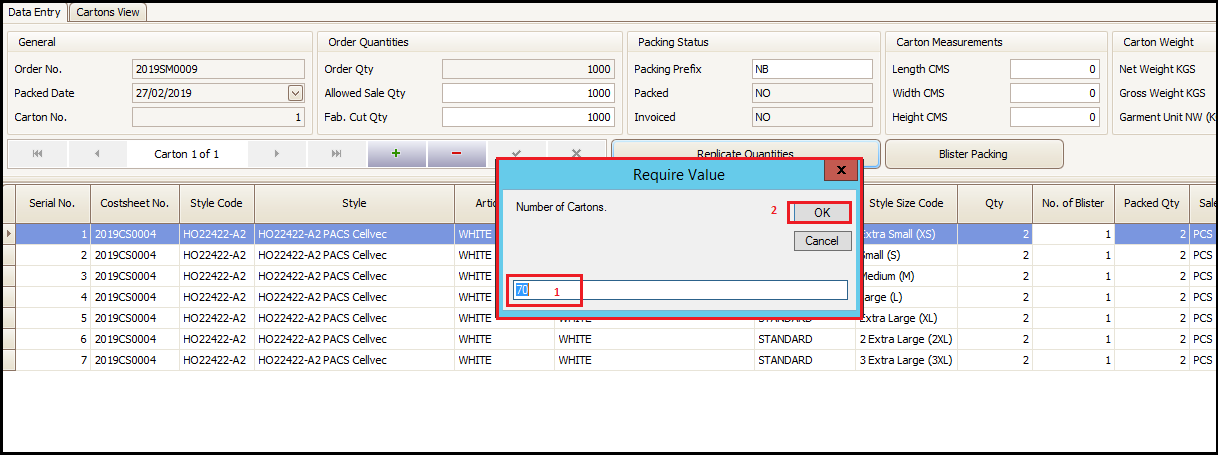
- New pop will open asking about number of cartons for this packing list
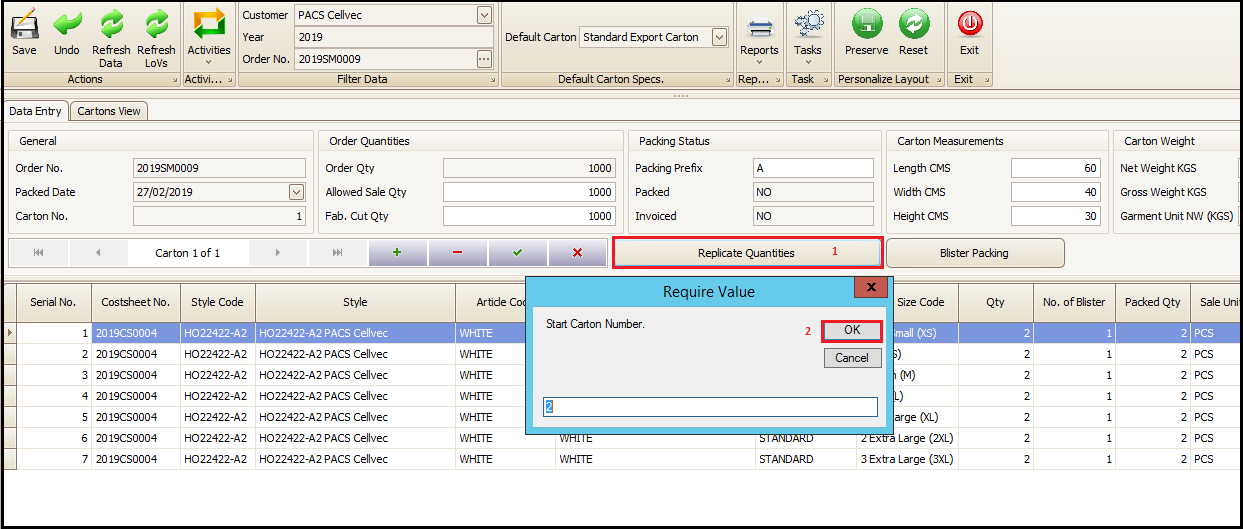
- System will bring the total number of cartons required for total sale order quantity according to packing quantity of first carton. Here user can change number of cartons as per the current packing list. Next, should click on okay to add the desired number (+1 already added) of cartons in current packing list.
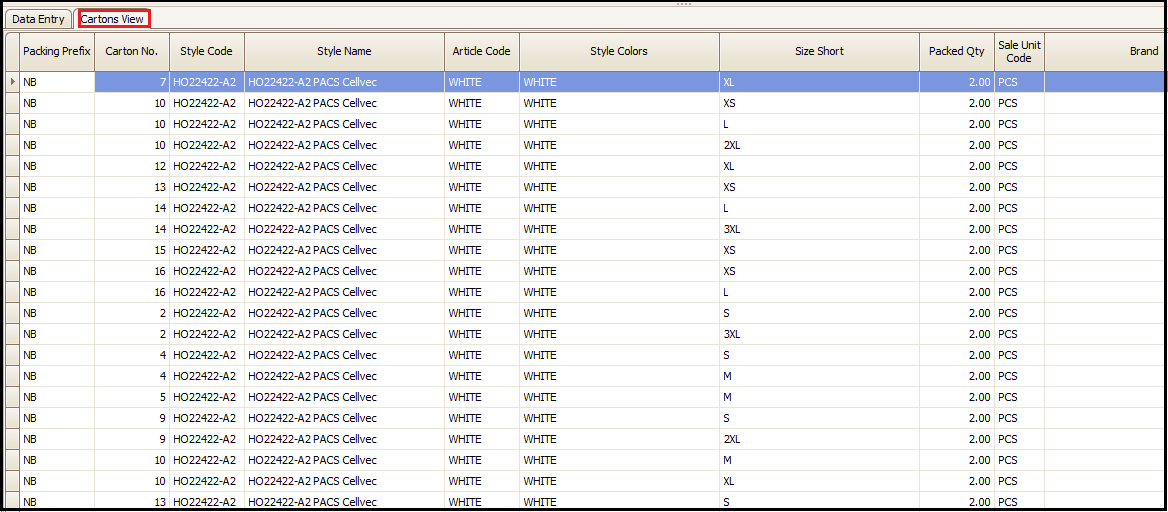
- To see the list of all cartons and packed quantity in each carton along with total packed quantity, user can click on ‘Cartons View’
- To see the packing list preview and print it user can click on ‘Reports’ and chose the right report of packing list out of available reports as per requirement.
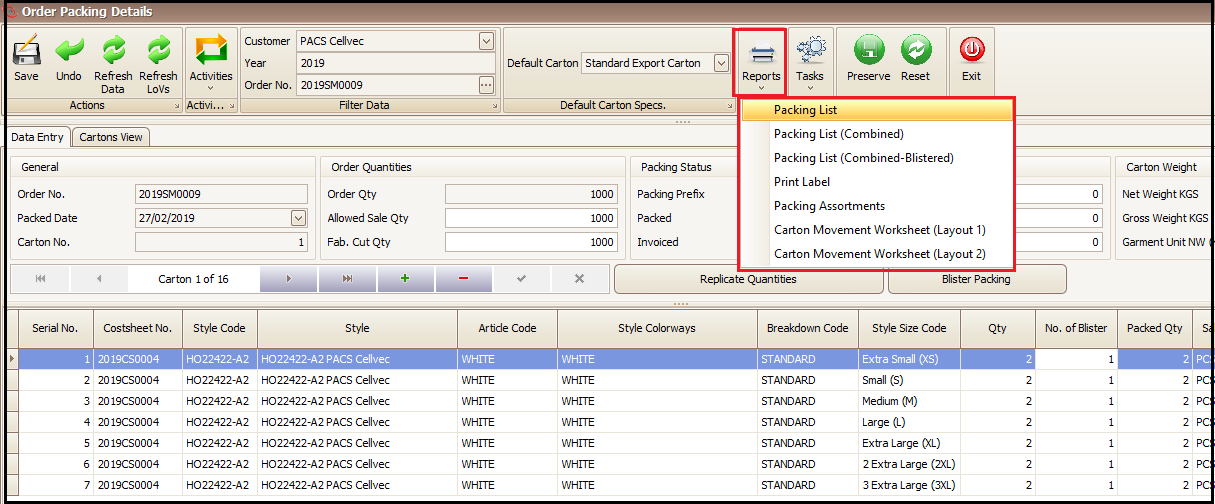
- In this case we are choosing the ‘Packing List’ report to view and print the packing list. Here user can choose which cartons to be kept in packing list print. After the cartons from and to are selected user have to click on OK.

- If correctly made, this packing list preview can be printed by clicking on print button as highlighted. If there is some incorrect data user can close it and go back to main screen and change the wrong data, come back and re print it.

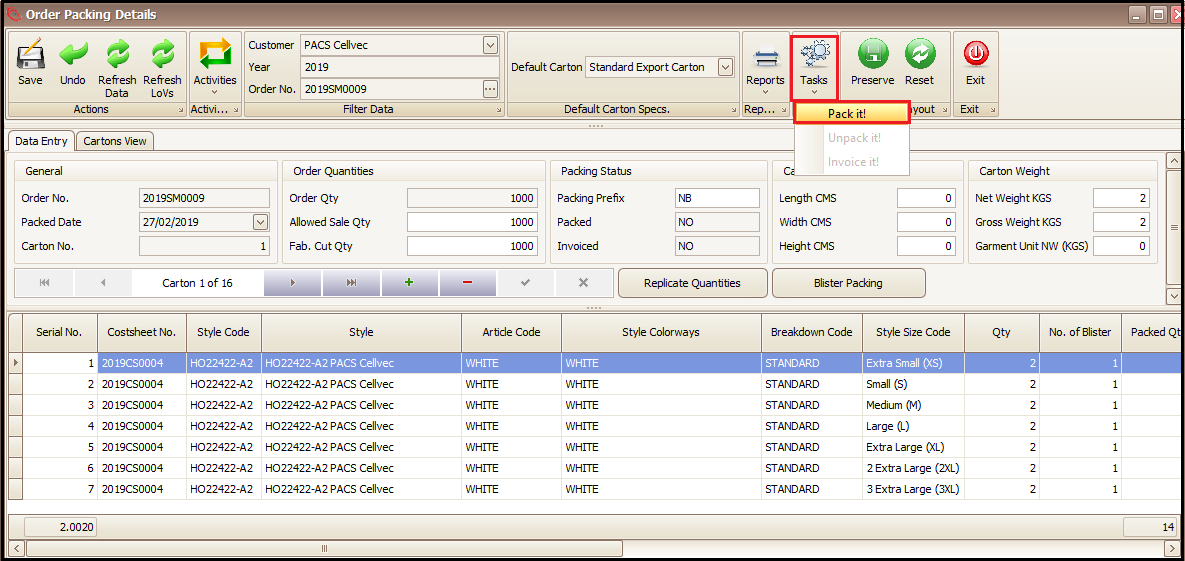
- Finally, to confirm the packing user has to go to ‘Tasks’ and click on ‘Pack it!’. The packing activity is completed. Only after packing is confirmed user can create the sales invoice.
3. Blister Based Packing
- Open the sale order and click on ‘Next Action’
- Click on ‘Pack it!’ (A new screen will open)
- Select the warehouse and click on OK.
- Click on ‘Activities’
- Click on ‘New Order/Carton’ (to add quantities from prepack entered in sale order click on ‘Build cartons from pre-pack’).
- Click on + to add the color size quantities being packed in that specific carton
Created with the Personal Edition of HelpNDoc: Easily create EBooks