How To Create a Style CostSheet
At the heart of Apparel-Connect's system is the cost sheet. All information pertaining to the product's style is entered here: including all the materials that go to make up the style, all the available size and color options, and estimates on all the external or variable costs. The cost sheet is the most important part of the application and it drives every subsequent process within Apparel-Connect. Take your time with the cost sheet, add all the required details, and you will find every step afterward as simple as can be.
You can imagine the cost sheet as a recipe for the style. Once you have Apparel-Connect up and running in production, creating a cost sheet can be a quick and easy process, but like any recipe only once you have all your ingredients ready and prepared! Every item you add into your cost sheet will need to have been previously defined in your masters: every fabric, trim, color code, size code, customer, supplier, and more.
Costing Your Styles - Creating a New Cost Sheet
All the important functions within Apparel-Connect are driven from the cost sheet. From the cost sheet you can generate samples, confirmed sales orders and contracts, and sales forecasts.
A cost sheet represents ALL material and non-material costs associated with producing your finished goods.
Apparel-Connect splits these costs into four groups:
- Fabrics:
The fabrics group includes your base (main) fabric and any contrast fabrics picked from the products master. Under the ‘Fabrics’ tab you choose which fabrics to use and enter the rating (consumption), and price. Under the ‘fabric colors’ tab you will select the color of each fabric for each article (color-way).
- Trims:
All trims for the style are recorded. Trims include items such as buttons, zips, tags, and labels. And in the same way as for fabrics, under the ‘Trims’ tab you select the product to use from the product master, the rating and price, and under the ‘trim colors’ tab you must specify the color of each trim for each article (color-way). In this way you can specify for example, black zips for one color-way and white zips for another.
- Embellishments:
Embellishments include embroidery, heat transfer, printing, and so on. Once you generate your sales order, you have the option on the embellishments tab to select that the work is to be done by the outsourced party or in-house.
- Variable Costs:
The variable costs account for all the extra costs associated with creating a style. You can include any additional expense you have per garment here; things such as packing, bag and hang, labor costs, trucking, and so on. Once you generate your sales order, you have the option on the variable costs tab to select that the work is to be done by outsourced party or in-house.
Between these four groups not only will you have all costs of producing your garment, but also all the possible color-way combinations and sizes available for the style. The rest of the application is driven from the completed cost sheet.
Take your time on the cost sheet. Fill in all the details and the simplicity of creating orders, raising material/service purchase orders, generating samples and managing production will pay off ten-fold.
In practice, on most occasions when you create a style cost sheet you will be doing so from a copy of an existing cost sheet as it is often the case that a new style will be a variation upon an older style. To start from a copy of an existing cost sheet simply click on the ‘Copy Style’ button:

In this case, all you need do is fill in the dialog box below:
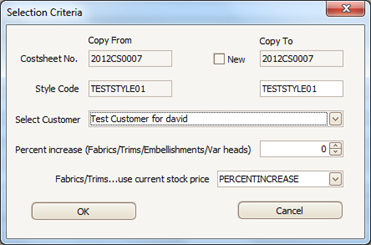
You can see that from the copy style screen you have the option to create a new cost sheet for the same style (by changing the cost sheet number but not the style code), or you can create new cost sheet for a new style. You can even copy the same cost sheet for use on a different style.
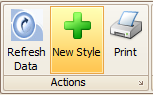
If you are creating a new style select the New Style button in the top navigation ribbon.
Here you can see the main cover page, which contains the main style information for the garment such as style category, apparel season, gender, style code, customer details etc.
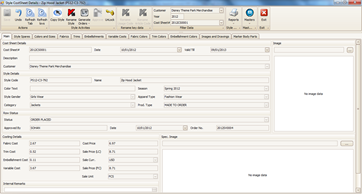
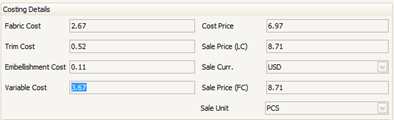
Also on this page is the basic summary of costing details:
The minimum you need enter on the main screen is style code, style name, customer.
The main key fields will already have a value, based on the last style created for this customer, but you should check this is the appropriate for your style before proceeding.
However, we recommend you try to fill in the cost sheet in as much detail as possible. You may wish to go back to it months later to copy it when you receive an order for a similar style, so try fill in as much as you can. We suggest that you also add a style description and a style image too.
Inside the Cost Sheet - The Tabs
Within the cost sheet, there are various tabs detailing of all the constituent elements that make up the style, the color-ways, and the possible size assortments. There is also a tab indicating the cutting and pattern marker details for the style.
First up, style spares, or sub-styles. Styles in Apparel-Connect can either consist of individual pieces or be assemblages of multiple pieces.
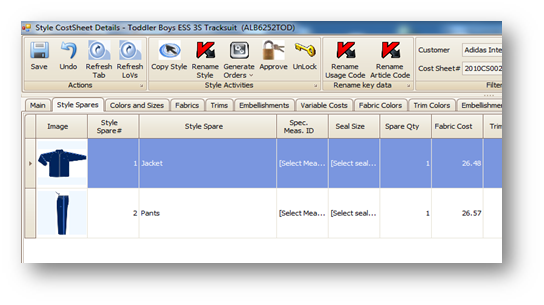
Style Spares
Style spares are entirely separate garments which, when put together, make up a particular style. Examples of styles with multiple spares are tracksuits, gloves, shoes, and even gift sets.
Separate spares can be cost-ed independently and sent to production independently. If a style is for two identical but symmetric items (such as in the case of shoes or gloves or socks), simply use a single spare, but change the quantity on that spare to ‘2’ (or the desired value).
In most cases you will only have one spare so need not enter anything on this page!.
Style Colors and Sizes
To add style colors and sizes included in this costing.
- Article Code: Use customer article code if provided, or type COMBO1, COMBO2 ,COMBO3 etc..
- Style Color: Name the combo/article/color-way (customer style color name)
- Image Location: If you have separate images for each color way upload here
- Style Sizes: Add all the available sizes for the style

Add Fabrics
- Switch to Fabric Tab.
- Click "+" button on bottom navigator to create new fabric.
- Start with spare selection, proceed to usage code and move left-to-right and add maximum data to can.
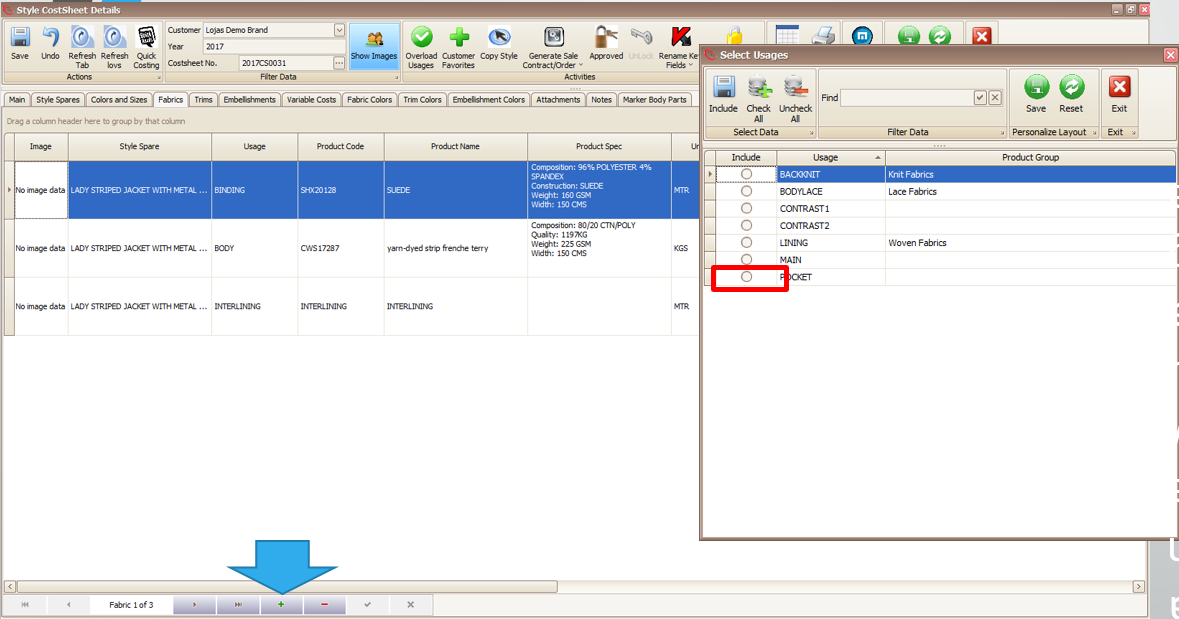
- Usage Code: What is the fabric/color used for? E.g. MAIN, SHELL, SHOULDER, PIPING, COLLAR, INTERLINING etc..
- Use "Overload Usages" when you need a usage that is not in the pop up list.
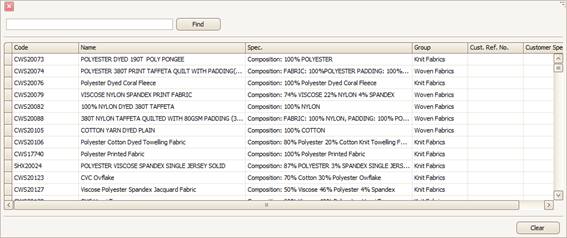
- After usage, select your required fabric from the fabric master. Fabric Code. Select fabric – or create new if does not exist [ + ].
- Standard Consumption. Input the rating/consumption per garment, OR For knit fabrics you can use our tool to calculate from measurement spec.
- Markup Qty % is how much extra will cost for wastage. PO Markup is how much extra you will actually buy. Normally, we add the same markup in both columns
- PO Price & PO Currency & PO Unit: Select unit and currency and then enter the price of your fabric. The system will calculate the standard price for you. You can use these when purchasing in a different unit or currency than your consumption unit. For example, unit of measurement for buttons is Pieces but perhaps buying in Gross.
- Standard Price: The internal cost for one unit of measurement. Average Price: The marketing or external cost for one unit of measurement.
- Average Price/Qty = Standard Price/Qty + Markup Price/Qty
- Print on Spec Sheet: Show colors of this item in the M.I. report. Select Yes (No for fusing / interlining)
- Main Fabric: Select Yes for main fabrics on each spare, all others No
- Approval Required (Yes/No): Select any fabrics which require buyer approval
- For woven fabrics the width is part of the product specification. Choose the appropriate fabric width when you add your fabric to your style. For knit fabrics, you may not know the diameter until the technicians make a marker, and you may use multiple diameters.
Adding Sized Products
Refer Sized Products (Style CostSheet)
Add Trims and Embellishments
- Add Trims like Labels, Buttons, etc.
- Add Embellishments like prints, washes and embroideries. The data entry is almost same like Fabric.
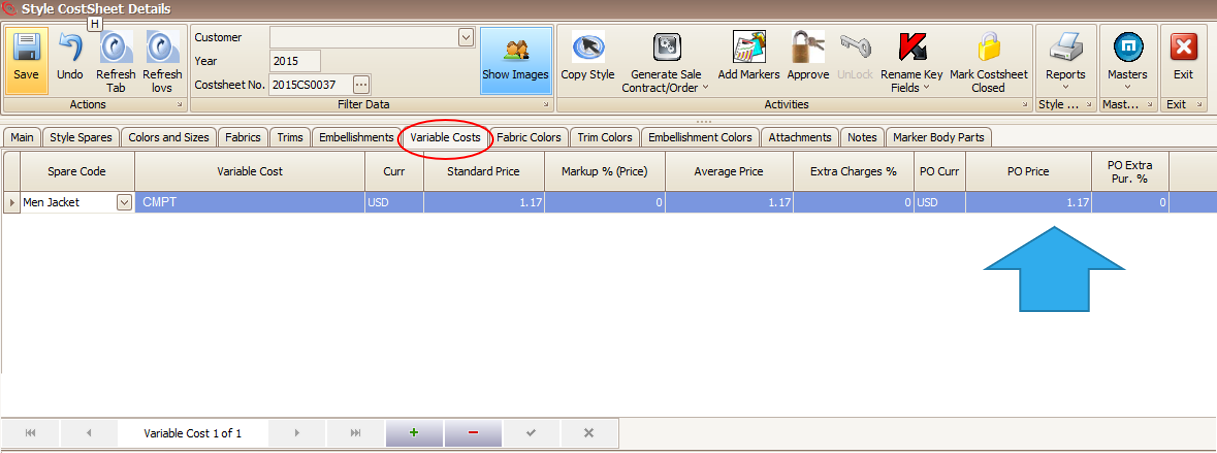
Add Variable Costs (Production etc)
Enter the Cutting, Sewing, and QC/Packing costs. Enter price in the PO price column.
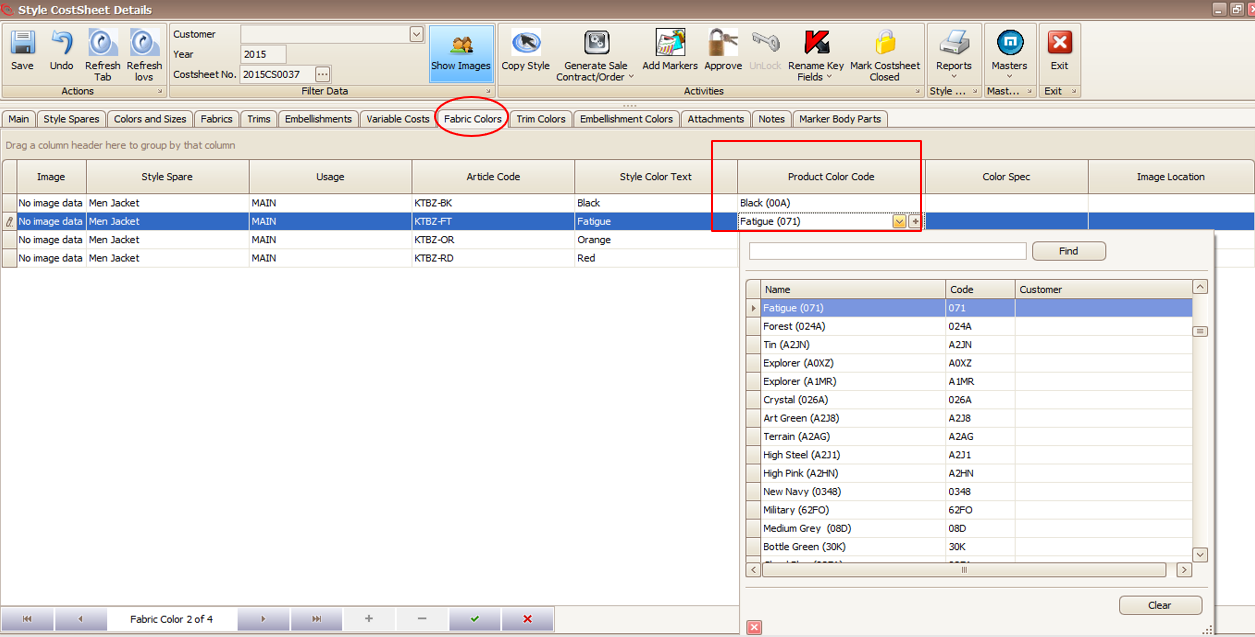
Link Fabric Colors to Style Colors (Articles)
Select the color fabric for each article and usage.
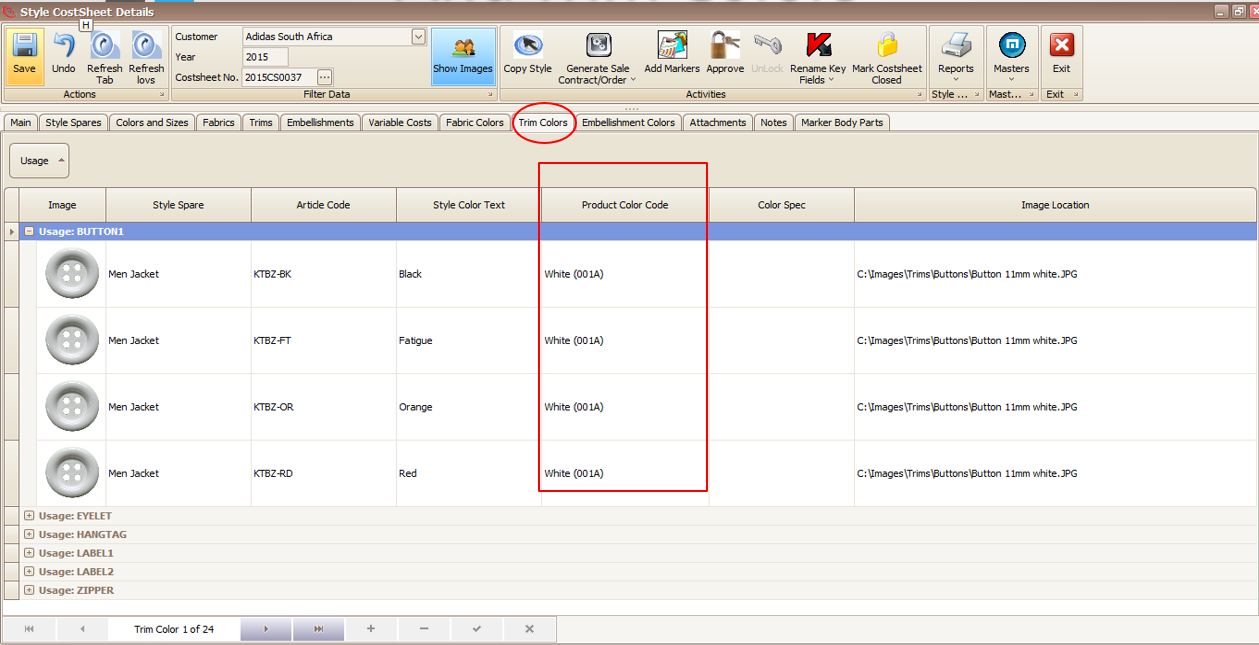
Link Trim colors with the Style Colors
Select the color trim for each article and usage. The trims start with the default color from the master
Different Products per Color-way (Style CostSheet)
Refer Different Products per Color-way (Style CostSheet)
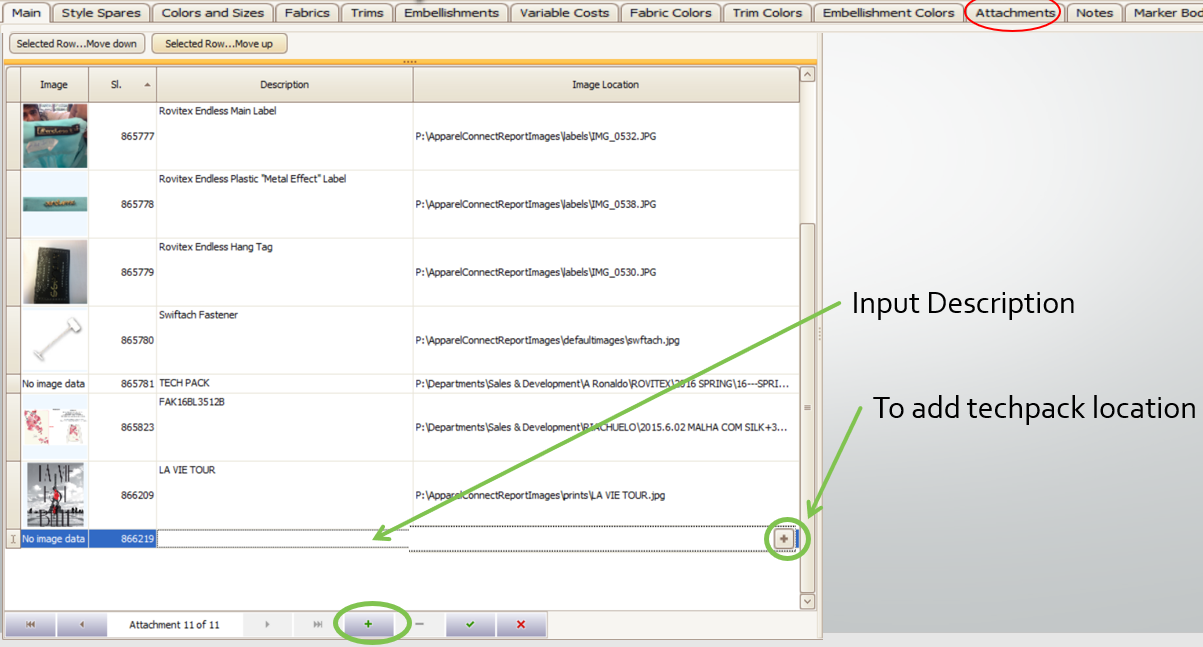
Add Tech Pack, Trim Pack and Measurements
Attachments are not optional. Attachments like the tech pack, measurement sheet, trim pack may be mandatory. In this case you will get an error when you try to approve the cost-sheet if you miss them.
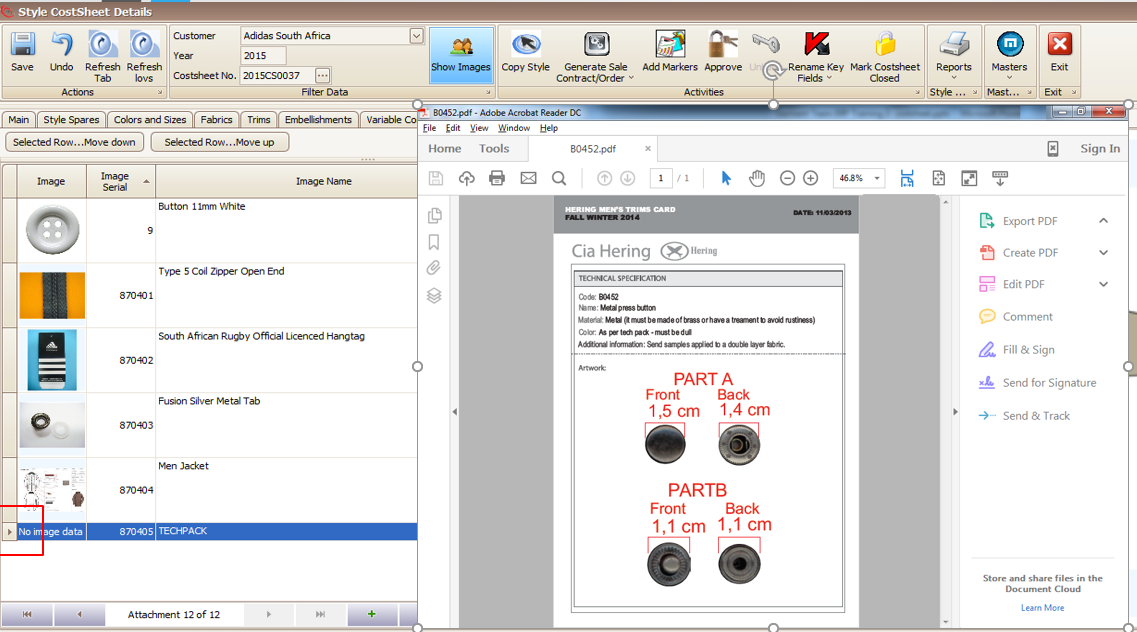
How to view attachments
- Double-click the left most column to open selected record.
- Any windows document is supported. Excel, PDF, Image etc.
Submissions & Approvals
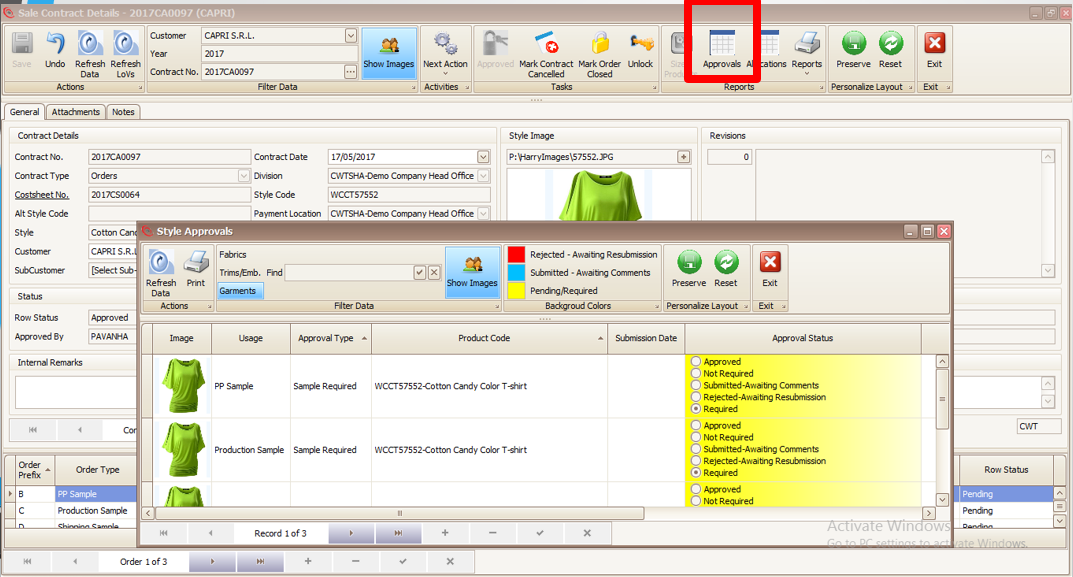
Refer Garment/Style Approvals
Approve Cost Sheet
As per configuration of the system cost sheet can be approved by the creator itself or can be sent to further approver authority (manager). This approval process works up-to five levels.
Approval is required before the cost-sheet can be used to create a buyer's Order/Contract. The cost-sheet will be checked for common mistakes when the first approve. After final approval the cost-sheet will be read only and protected from any changes.
Refer Document Approvals
Created with the Personal Edition of HelpNDoc: Easy CHM and documentation editor